 A4 Front Page Studio
How to Make a School Project Front Page (Step by Step)
The front page, also called the cover page or title page, is the first thing your teacher sees when the file lands on the desk. It cannot earn you marks for the content inside, but a neat cover tells the reader that the work was done with care, and a messy one quietly lowers expectations before a single page is read. The good news is that a clean cover is mostly a matter of order and spacing, not artistic talent. This guide walks through the whole process in the order that saves the most time, and shows real covers made in our free tool so you can see what the advice looks like on paper.
- Step 1: Collect every detail before you start
- Step 2: Choose a layout that fits the subject and the class
- Step 3: Build a clear visual order
- Step 4: Keep the typography simple
- Step 5: Respect the margins
- Step 6: Make it in the tool
- Step 7: Proofread like a stranger
- Step 8: Print or save
- Common mistakes to avoid
- Quick answers
Step 1: Collect every detail before you start
Most people lose time because they open a design tool first and discover halfway through that they do not know the section letter or the exact title. Instead, write the details on a scrap of paper or in your notes app. A typical Indian, Bangladeshi or Nepali school cover needs the following:
- The project title or the subject name, spelled exactly as the teacher wrote it on the board
- Your full name as it appears in the school register
- Class, section and roll number
- Registration number, if your school or board uses one
- School name, and the school logo if your school allows it
- The teacher’s name or the phrase “Submitted to”
- The academic session, for example 2026–27
If the school has given a written format, copy it exactly. Teachers often check covers against the format, and a missing field is easier to fix now than after printing.
Step 2: Choose a layout that fits the subject and the class
A layout is the arrangement of the title, the details block and the decoration. Pick the layout first and the colours second, because it is much easier to recolour a good layout than to rescue a crowded one. For a science or mathematics file, choose a quiet layout with a plain border and a clear details block. For languages, art or a creative project you can allow more colour and a bigger title. As a simple rule, the more decoration a page has, the shorter the text on it should be.
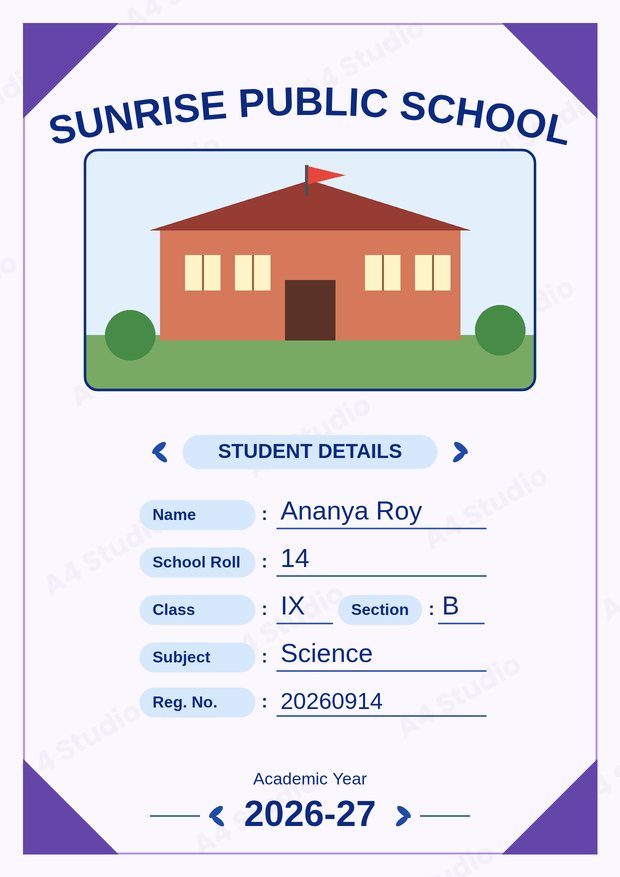
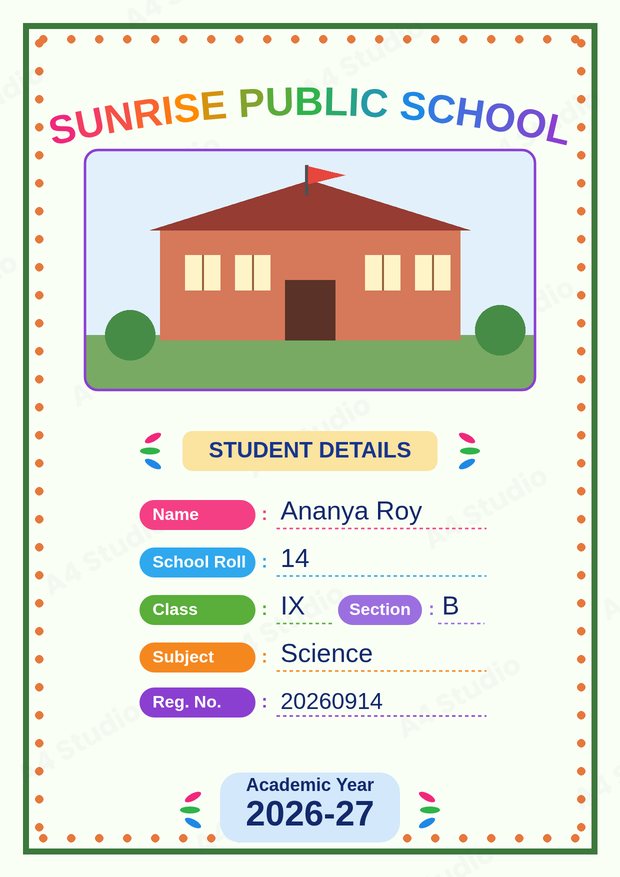
Both covers above contain exactly the same information. The first reads as formal and the second as friendly. Neither is better; the right choice depends on who will read it. When you are unsure, go formal, because a formal cover is never wrong, while a playful one can feel out of place in a serious subject.
Step 3: Build a clear visual order
A reader should know where to look first, second and third without thinking. Aim for this order of importance, from biggest to smallest:
- School name or project title, whichever your teacher cares about most, in the largest type on the page.
- Subject and class at medium size, close to the title.
- Student and teacher details in smaller type, grouped in one block rather than scattered around the page.
- Session or date at the bottom edge, in the smallest size.
Group related things. Your name, class, section and roll belong together; the teacher’s name belongs in a separate group. Space between groups does the job that lines and boxes would otherwise do, so you need fewer decorations.
Step 4: Keep the typography simple
Use one decorative or bold font for the title and one plain font for everything else. Three fonts is the practical maximum on a single page. Make sure the smallest text is still comfortably readable when printed: if you hold the page at arm’s length, you should be able to read your roll number. Our guide on choosing and pairing fonts goes deeper, and the guide on colour combinations explains how to keep text readable on any background.
Step 5: Respect the margins
Leave at least 10 to 15 millimetres of clear space on every side. Home and shop printers often cannot print right up to the edge of the paper, and anything that touches the edge may be clipped. If the file will be punched or stapled on the left, give that side a little extra room. A border that sits comfortably inside the paper edge always looks more professional than one that is almost cut off.
Step 6: Make it in the tool
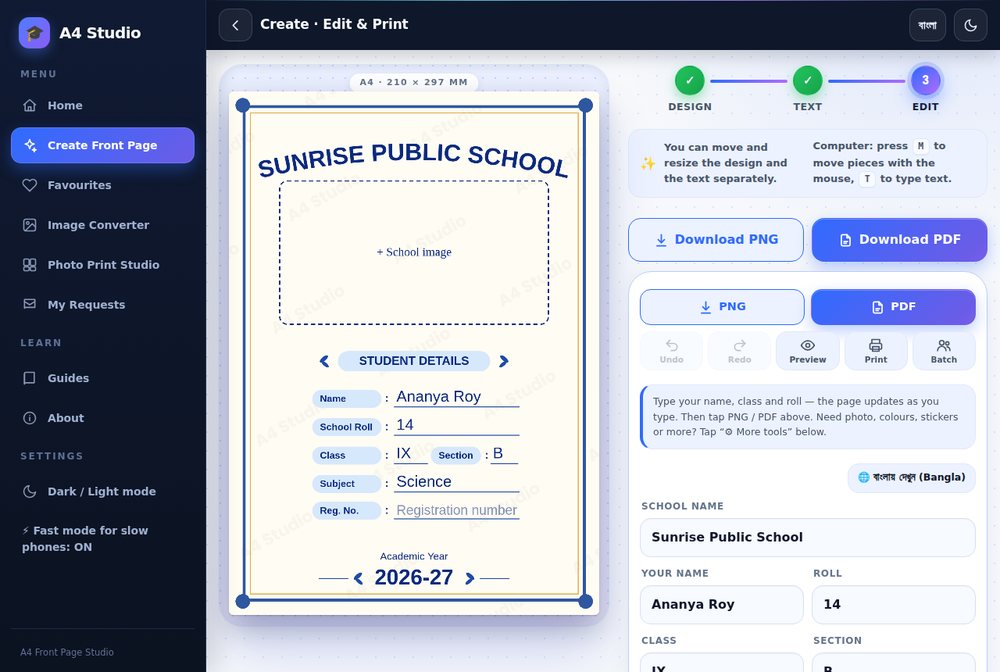
In A4 Front Page Studio the process takes three screens: choose a design, choose a text template, then type your details on the editing screen. The page updates as you type, so you see mistakes at once. You can add a school photo or logo, change colours, and move any piece with your finger or mouse before you download.
Step 7: Proofread like a stranger
The most common cover mistakes are not design mistakes at all. They are a misspelled school name, a wrong section, or a roll number typed as 41 instead of 14. Read every line out loud, slowly. Then ask a friend to read it without looking at your notes. Check the session year last, because it is the detail people most often forget to update from last year’s sample.
Step 8: Print or save
Print on A4 paper with the scale set to 100 per cent or “Actual size”. If you cannot print at home, save the page as a PDF and take it to a shop. The guides on printing correctly and on choosing between PDF and PNG cover the settings in detail.
Common mistakes to avoid
- Text that is too small. Small type looks tidy on a screen and becomes unreadable on paper.
- Dark text on a dark background. Contrast matters more than any other design choice.
- Stretched logos and photos. Always keep the original proportions.
- Too many colours and fonts. Two or three colours are enough.
- Crowding the edges. Empty space is part of the design.
- Missing details. Check the school’s format before you print.
Quick answers
How long should it take to make a cover page?
With your details ready, about five to ten minutes in a template tool. Most of that time is proofreading.
Do I need to draw the border by hand?
No. Unless your teacher specifically asks for a hand-made cover, a printed cover on A4 paper is normal and accepted in most schools.
Can I use the same cover for every subject?
You can keep the same layout and change only the subject name. That keeps your files looking like a matching set.
A clean cover does not need hours of work. Collect the details, pick one clear layout, keep the text readable, and check the spelling twice. That is enough to make the first page of your project look careful and confident.
Open the free A4 Front Page Studio →